Around beginning of last month, GitHub users can buy a special edition U2F security keys for 5 USD (5000 keys were available), and I got two of them. Universal 2nd Factor (U2F) is an open authentication standard that strengthens and simplifies two-factor authentication using specialized USB or NFC devices.
A U2F USB key is a second factor authentication device so it doesn’t replace our password. To login to a website, we need to enter our username and password, AND the U2F USB key. To check for user presence (to prevent malware from accessing the key without user consent), the device usually has a button that needs to be pressed when logging in.
Currently Google (Gmail, Google Drive, etc), Github, and Dropbox supports U2F devices, and we can also add support to our own site or apps using plugins or accessing the API directly (plugin for WordPress is available).
After receiving the keys, I got curious and started to read the U2F specifications. The protocol is quite simple, but so far I haven’t been able to find an implementation of a U2F key device using existing microcontrollers (Arduino or anything else). The U2F protocol uses ECC signing and I found that there is already a small ECC library for AVR and ARM (micro-ecc). It supports ECDSA with P-256 curve required by U2F.
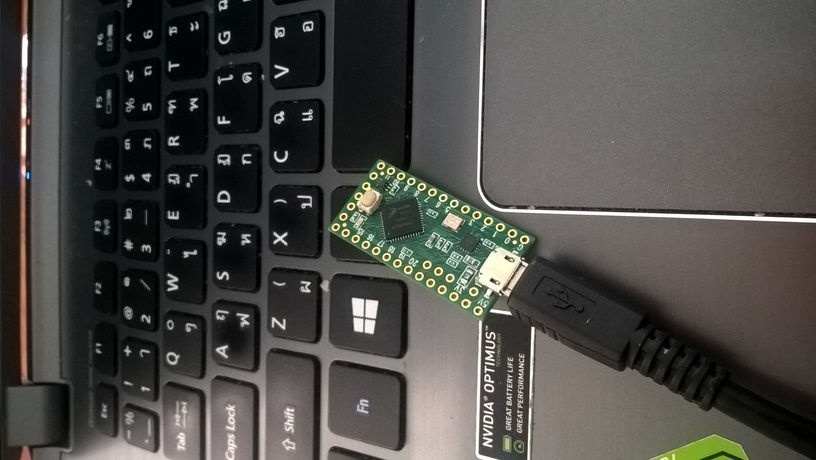
A U2F device is actually just a USB HID Device, so I will need something that I can easily program as an HID device. The easiest device to program that I have is Teensy LC. I tested compiling the micro-ecc library, and found out that it results in about 15 kilobytes of code, so Teensy LC should be OK (it has 64 kbyte flash, and 8KB of RAM). Teensy LC is also very small, it’s ideal if someday I want to put a case around it.
I can’t find an easy way to add new USB device using Teensyduino, so I decided to just patch the usb_desc.h, the only changes needed was to change the RAWHID_USAGE_PAGE to 0xf1d0 and RAWHID_USAGE to 0x01. I changed the PRODUCT_NAME to “Teensyduino U2FHID” just to make it easy to check that this works. The nice thing is: this doesn’t break anything (all code using RawHID would still run with this changes), and we can still see our code output using the virtual serial port provided by Teensyduino.
#elif defined(USB_RAWHID)
  #define VENDOR_ID		0x16C0
  #define PRODUCT_ID		0x0486
//  #define RAWHID_USAGE_PAGE	0xFFAB  // recommended: 0xFF00 to 0xFFFF
//  #define RAWHID_USAGE		0x0200  // recommended: 0x0100 to 0xFFFF
  #define RAWHID_USAGE_PAGE	0xf1d0  // recommended: 0xFF00 to 0xFFFF
  #define RAWHID_USAGE		0x01  // recommended: 0x0100 to 0xFFFF

  #define MANUFACTURER_NAME	{'T','e','e','n','s','y','d','u','i','n','o'}
  #define MANUFACTURER_NAME_LEN	11
  #define PRODUCT_NAME		{'T','e','e','n','s','y','d','u','i','n','o',' ','U','2','F','H','I','D'}
The U2F protocol is actually quite simple. When we want to use the hardware U2F key in a webapp (or desktop app), we need to add the USB key that we have to the app database. Practically, in the website, you would choose a menu that says “Add device” or “register new device”.
When you choose the register/add device, the app will send a REGISTER request to they hardware U2F USB key with a unique appid (for web app, this consist of domain name and port). The hardware U2F key will generate a private/public key pair specific for this app id, and the hardware U2F key will respond by sending a “key handle” and a “public key” to the app. If we have several usernames in an app/website, we can use a single hardware U2F key to be used for all accounts (the “key handle” will be different for each account).
Next time the user wants to login, the app/webapp will send authentication request to the hardware U2F key. In practice, when logging in, the website will request you to plug the hardware U2F key and press the button in the hardware key.
The app will send a random challenge and the appid (to identify which app it is), and the “key handle” (so the hardware U2F key will know which private key to use to sign the request). The hardware U2F key will reply with the same random challenge signed with the private key corresponding with the “key handle”, and it will also increase a counter (the counter is to prevent re-play attack and cloning attack).
There are two ways the hardware U2F key can keep track of which private key to use for a “key handle”: first one is to store a mapping of key handle to private key in a storage in the hardware U2F key, and when an app asks for a specific key handle, it can look up the private key in the storage. The second method is easier, and doesn’t require any storage, but slightly less secure: the “key handle” actually contains the private key itself (in encrypted form, otherwise anyone can send the request). Since the Teensy LC only contains 128 of EPROM, I used the second approach.
Google provides U2F reference code including something to test USB U2F keys. I started using this to test my implementation step by step using HidTest and U2Ftest. In retrospect this was not really necessary to get a working U2F key for websites. There are cases that just wouldn’t happen normally, and sometimes the test requires strange assumption (for example: as far as I know nothing in the specification says that key handle size must be at least 64 bytes in size).
Teensy LC doesn’t provide a user button (just a reset button), and I don’t want to add a button to it (it wouldn’t be portable anymore). So I just implemented everything without button press. This is insecure, but it’s ok for me for testing. For “key handle” I use a very simple xor encryption with fixed key which is not very secure. If you want a more secure approach, you can use a more complicated method.
Most of the time implementing your own device is not more secure than buying commercial solution, but sometimes it has some advantages over commercial solutions. For example: most devices that I know of doesn’t have a ‘reset’ mechanism. So if for instance you are caught having a device, and they have access to a website data, they can prove from your device that you have an account in that site (there is a protocol to check if a given key handle is generated by a hardware U2F device).
In our custom solution we can reset/reflash our own device (or just change the encryption key)) and have a plausible deniability that we are not related to that site (the suggestion in the U2F specification was to destroy a device if you no longer want to associate a website with your device if your device doesn’t have reset mechanism).
I have published my source in github in case someone wants to implement something similar for other devices (or to improve my implementation). I have included the micro-ecc source because I want to experiment by removing some unneeded functions to reduce the code size (for example: we always use uncompressed point representation for U2F, we only use a single specific Curve, we never need to verify a signature, etc). You should change the key “-YOHANES-NUGROHO-YOHANES-NUGROHO-” for your own device (must be 64 characters if you want security). There are still a lot of things that I want to explore regarding the U2F security, and having a device that I can hack will make things easier.
Update: some people are really worried about my XOR method: you can change the key and make it 64 bytes long. It’s basically a one-time-pad (xoring 64 bytes, with some unknown 64 bytes). If you want it to be more secure: change the XOR into anything else that you want (this is something that is not specified in the standard). Even a Yubico U2F device is compromised if you know the master key, in their blog post, they only mentioned that the master key is generated during manufacturing, and didn’t say if they also keep a record of the keys.
Update again: this is not secure, see http://www.makomk.com/2015/11/10/breaking-a-teensy-u2f-implementation/.
Regarding the buttonless approach: it’s really easy to add them. In my code, there is an ifdef for SIMULATE_BUTTON. It will just pretend that the button was not pressed on first request, and pressed on second request. Just change it so that it really reads a physical button.