Teensy LC U2F key

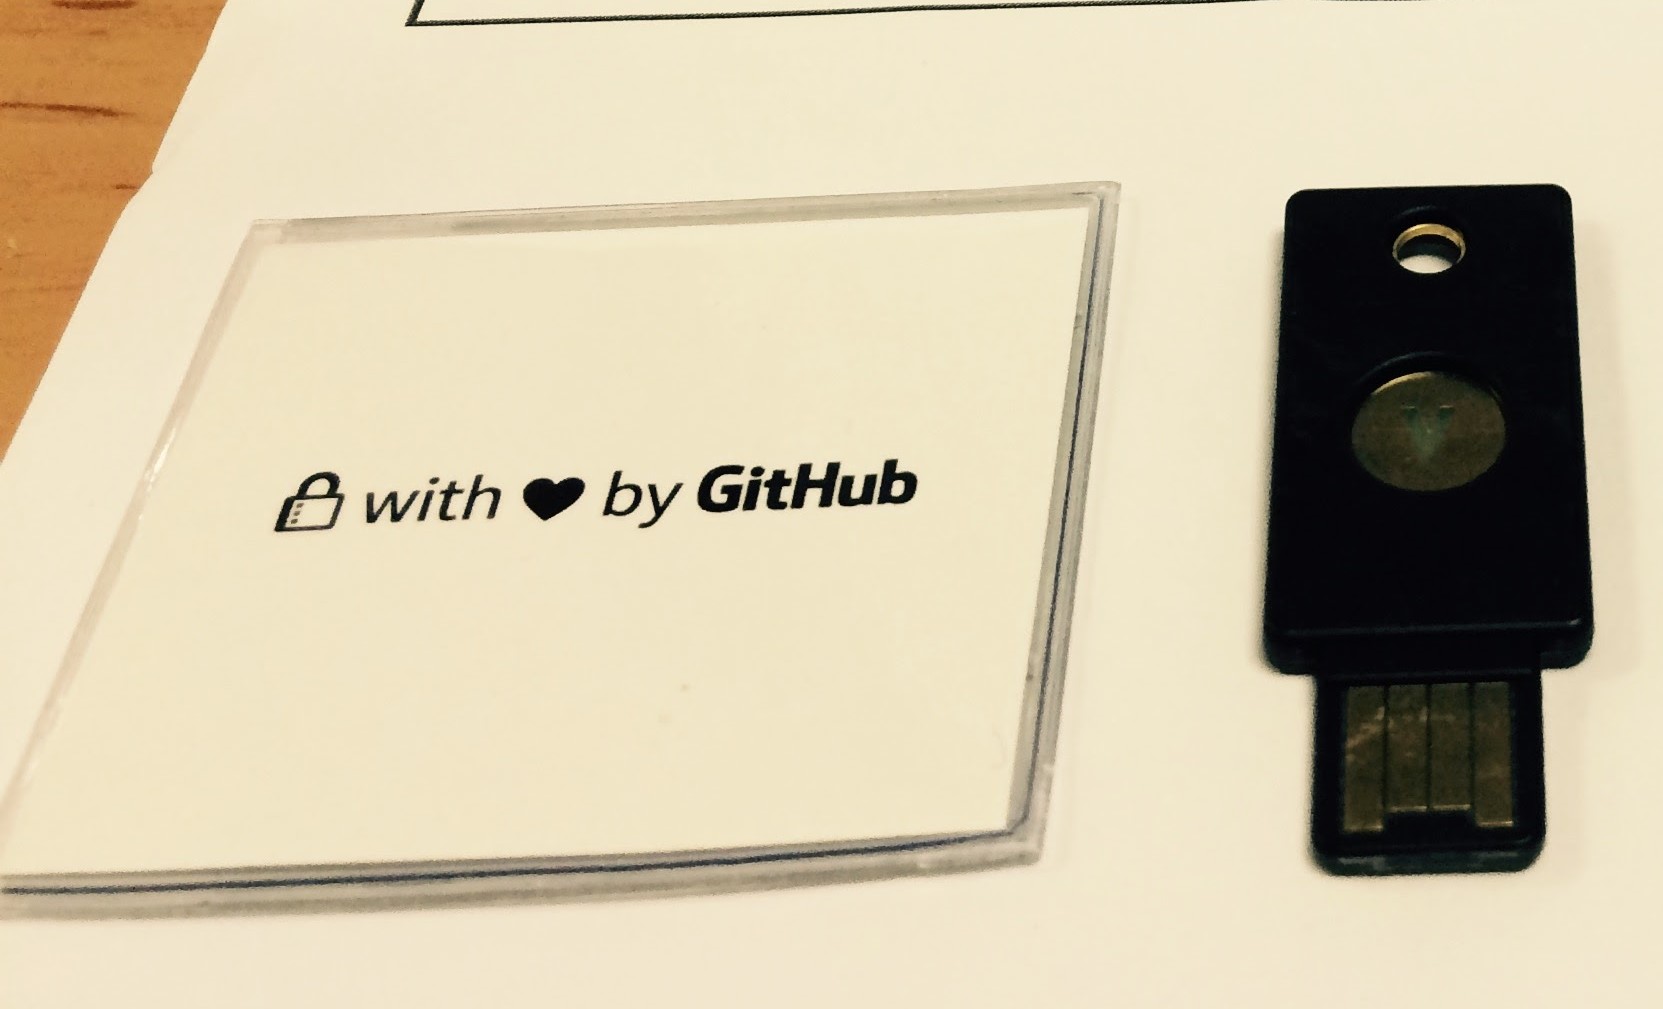
Around beginning of last month, GitHub users can buy a special edition U2F security keys for 5 USD (5000 keys were available), and I got two of them. Universal 2nd Factor (U2F) is an open authentication standard that strengthens and simplifies two-factor authentication using specialized USB or NFC devices.

A U2F USB key is a second factor authentication device so it doesn’t replace our password. To login to a website, we need to enter our username and password, AND the U2F USB key. To check for user presence (to prevent malware from accessing the key without user consent), the device usually has a button that needs to be pressed when logging in.

Currently Google (Gmail, Google Drive, etc), Github, and Dropbox supports U2F devices, and we can also add support to our own site or apps using plugins or accessing the API directly (plugin for WordPress is available).

After receiving the keys, I got curious and started to read the U2F specifications. The protocol is quite simple, but so far I haven’t been able to find an implementation of a U2F key device using existing microcontrollers (Arduino or anything else). The U2F protocol uses ECC signing and I found that there is already a small ECC library for AVR and ARM (micro-ecc). It supports ECDSA with P-256 curve required by U2F.
IMG_5470

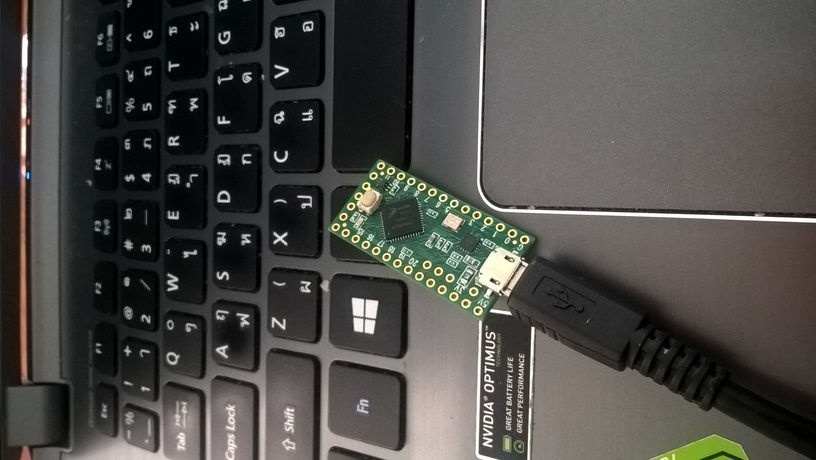
A U2F device is actually just a USB HID Device, so I will need something that I can easily program as an HID device. The easiest device to program that I have is Teensy LC. I tested compiling the micro-ecc library, and found out that it results in about 15 kilobytes of code, so Teensy LC should be OK (it has 64 kbyte flash, and 8KB of RAM). Teensy LC is also very small, it’s ideal if someday I want to put a case around it.

I can’t find an easy way to add new USB device using Teensyduino, so I decided to just patch the usb_desc.h, the only changes needed was to change the RAWHID_USAGE_PAGE to 0xf1d0 and RAWHID_USAGE to 0x01. I changed the PRODUCT_NAME to “Teensyduino U2FHID” just to make it easy to check that this works. The nice thing is: this doesn’t break anything (all code using RawHID would still run with this changes), and we can still see our code output using the virtual serial port provided by Teensyduino.

#elif defined(USB_RAWHID)
  #define VENDOR_ID		0x16C0
  #define PRODUCT_ID		0x0486
//  #define RAWHID_USAGE_PAGE	0xFFAB  // recommended: 0xFF00 to 0xFFFF
//  #define RAWHID_USAGE		0x0200  // recommended: 0x0100 to 0xFFFF
  #define RAWHID_USAGE_PAGE	0xf1d0  // recommended: 0xFF00 to 0xFFFF
  #define RAWHID_USAGE		0x01  // recommended: 0x0100 to 0xFFFF

  #define MANUFACTURER_NAME	{'T','e','e','n','s','y','d','u','i','n','o'}
  #define MANUFACTURER_NAME_LEN	11
  #define PRODUCT_NAME		{'T','e','e','n','s','y','d','u','i','n','o',' ','U','2','F','H','I','D'}

The U2F protocol is actually quite simple. When we want to use the hardware U2F key in a webapp (or desktop app), we need to add the USB key that we have to the app database. Practically, in the website, you would choose a menu that says “Add device” or “register new device”.

When you choose the register/add device, the app will send a REGISTER request to they hardware U2F USB key with a unique appid (for web app, this consist of domain name and port). The hardware U2F key will generate a private/public key pair specific for this app id, and the hardware U2F key will respond by sending a “key handle” and a “public key” to the app. If we have several usernames in an app/website, we can use a single hardware U2F key to be used for all accounts (the “key handle” will be different for each account).

Next time the user wants to login, the app/webapp will send authentication request to the hardware U2F key. In practice, when logging in, the website will request you to plug the hardware U2F key and press the button in the hardware key.

The app will send a random challenge and the appid (to identify which app it is), and the “key handle” (so the hardware U2F key will know which private key to use to sign the request). The hardware U2F key will reply with the same random challenge signed with the private key corresponding with the “key handle”, and it will also increase a counter (the counter is to prevent re-play attack and cloning attack).

There are two ways the hardware U2F key can keep track of which private key to use for a “key handle”: first one is to store a mapping of key handle to private key in a storage in the hardware U2F key, and when an app asks for a specific key handle, it can look up the private key in the storage. The second method is easier, and doesn’t require any storage, but slightly less secure: the “key handle” actually contains the private key itself (in encrypted form, otherwise anyone can send the request). Since the Teensy LC only contains 128 of EPROM, I used the second approach.

Google provides U2F reference code including something to test USB U2F keys. I started using this to test my implementation step by step using HidTest and U2Ftest. In retrospect this was not really necessary to get a working U2F key for websites. There are cases that just wouldn’t happen normally, and sometimes the test requires strange assumption (for example: as far as I know nothing in the specification says that key handle size must be at least 64 bytes in size).

Teensy LC doesn’t provide a user button (just a reset button), and I don’t want to add a button to it (it wouldn’t be portable anymore). So I just implemented everything without button press. This is insecure, but it’s ok for me for testing. For “key handle” I use a very simple xor encryption with fixed key which is not very secure. If you want a more secure approach, you can use a more complicated method.

Most of the time implementing your own device is not more secure than buying commercial solution, but sometimes it has some advantages over commercial solutions. For example: most devices that I know of doesn’t have a ‘reset’ mechanism. So if for instance you are caught having a device, and they have access to a website data, they can prove from your device that you have an account in that site (there is a protocol to check if a given key handle is generated by a hardware U2F device).

In our custom solution we can reset/reflash our own device (or just change the encryption key)) and have a plausible deniability that we are not related to that site (the suggestion in the U2F specification was to destroy a device if you no longer want to associate a website with your device if your device doesn’t have reset mechanism).
teensy

I have published my source in github in case someone wants to implement something similar for other devices (or to improve my implementation). I have included the micro-ecc source because I want to experiment by removing some unneeded functions to reduce the code size (for example: we always use uncompressed point representation for U2F, we only use a single specific Curve, we never need to verify a signature, etc). You should change the key “-YOHANES-NUGROHO-YOHANES-NUGROHO-” for your own device (must be 64 characters if you want security). There are still a lot of things that I want to explore regarding the U2F security, and having a device that I can hack will make things easier.

Update: some people are really worried about my XOR method: you can change the key and make it 64 bytes long. It’s basically a one-time-pad (xoring 64 bytes, with some unknown 64 bytes). If you want it to be more secure: change the XOR into anything else that you want (this is something that is not specified in the standard). Even a Yubico U2F device is compromised if you know the master key, in their blog post, they only mentioned that the master key is generated during manufacturing, and didn’t say if they also keep a record of the keys.

Update again: this is not secure, see http://www.makomk.com/2015/11/10/breaking-a-teensy-u2f-implementation/.

Regarding the buttonless approach: it’s really easy to add them. In my code, there is an ifdef for SIMULATE_BUTTON. It will just pretend that the button was not pressed on first request, and pressed on second request. Just change it so that it really reads a physical button.

EZ430-Chronos OTP

After wanting the EZ430 Chronos watch for a long time, I finally ordered one on Febuary 20th from TI eStore, and I got the watch on February 24th (Tax Free). So this is another stuff in my long list of “things to hack”.

I had a good idea to use my Ez430 Chronos as OTP generator for Google 2 factor authentication. Before my long weekend, I did my research on Thursday (24 February) and that time no one had implemented it. So I wrote a small modification to OpenChronos, and just before I finished my implementation on Sunday (I was quite busy during the long weekend helping to move our company’s office), I looked at Chronos Wiki again to find some links to the chronos documentation, and found out that Huan Truong has just implemented his version of OTP by modifying OpenChronos.

After learning that in his version the clock function doesn’t work yet (in his readme it says “THIS FIRMWARE CURRENTLY HAS A YET-TO-IMPLEMENT CLOCK FUNCTIONALITY, SO IT WONT DISPLAY TIME PROPERLY”), I decided to continue my implementation. My implementation doesn’t change the time logic so you can still use the stock Control Center provided by TI (Huan Troung changed the OpenChronos code to use epoch implementation, and he modified the control center) . Instead of replacing all algorithms to use timestamp, I use a simple mktime implementation to convert existing year/month/date data to unix timestamp.

After flashing the image to the watch, a new menu is added to the second line after “rFbSL”, it will show a heart icon and first 2 digits of the OTP (I will never buy a heart monitor for this watch so I use that icon just to show that I am in OTP mode). Pressing the “#” key for a few seconds will show the remaining 4 digits. Just for your information, enabling CONFIG_OTP adds 2914 bytes to the code size.

So here is my version of Google OTP (If many people are interested, I can put it in github):

http://tinyhack.com/files/OpenChronos-joe-otp.zip

I am too lazy to implement the “make config’, just edit otp.h with your key, and fill in the timezone offset (+N from UTC). You can get the key from base32 encoded string using codegen script that I made, for example:

bash$ python codegen.py pf xwqy lomvz wu 33f
\x79\x6f\x68\x61\x6e\x65\x73\x6a\x6f\x65

https://github.com/yohanes/OpenChronos

You can use make config to set your secret key in base32 (that means you can just copy paste from the auth code presented by Google), and you can set the timezone offset.

CNS11XX FreeBSD port completed

It has been a long time since I started this project, and even though I am making a good progress at the beginning, my progress was getting slower lately. Today I decided to take a day off from work to finish some remaining task: network driver, automatic memory detection, and flash device support.

Pyun YongHyeon have helped me a lot with the network driver. The speed is still not good, but he have helped to make the network driver to more correct (better, more reliable). I will still need to ask him to check for the final version, but I believe I have fixed most errors he pointed out.

My agestar, which also uses CNS11XX devices comes with 32Mb memory, while the Emprex NSD-100 have 64mb of memory. I have added a code to autodetect the memory size. So one binary file should work on both devices.

The flash device in Emprex NSD-100 complies with CFI, and it was very easy to use with the existing CFI driver. I just need to write several lines of code. The next step is to boot freebsd directly from the flash (with the root filesystem on USB). Unlike in Linux, the flash device can not be accessed as partitions (not yet).

First, we need to write the kernel.bin to cfi0, because the first 132 kb is used by boot loader, we need to skip to somewhere > 132kb. To make it easy, i just skip 1 megabyte from beginning of flash.

dd if=kernel.bin seek=1 bs=1m of=/dev/cfi0

be very very very careful with the dd command. Without correct seek and bs, you may overwrite the bootloader. The command will take quite a long time to finish (3 minutes).

Next step is to set the initial boot command. In the boot loader, setup bootcmd to copy the data in ram to 0x1000000 from 0x10100000, then boot the device:

setenv bootcmd cp.l 0x10100000 0x1000000 0x1a0000\;go 0x1000000
saveenv

Now when we boot the device, we should go directly to freebsd.

I won’t provide binaries, but the latest source code is in:

http://p4db.freebsd.org/depotTreeBrowser.cgi?FSPC=//depot/projects/str91xx/src/sys/arm/econa&HIDEDEL=NO

CNX11XX/STR91XX FreeBSD Progress

Last weekend I continued my work on FreeBSD port. I am concentrating on the network speed improvement, and I made a good progress with it. The network speed is now about 2.1 Mbps (FTP upload from device), this is still slower than the Linux version but i think it already reach a usable state (I think I should be able to stream some DivX files through HTTP from it). I will ask around in the freebsd-arm/freebsd-net mailing list so I can do more improvement on the driver.

I am still a bit worried playing around with the Flash, since I don’t have anything to restore it back in case I made a mistake. So I think I will leave this part for a while.

For everyone who have NSD-100 with Serial Port attached to it, you can try a precompiled binary thah I have prepared, or you can compile from source. To use the binary version, you will need a USB disk (at least 2GB in size), and a TFTP server. Actually you only need about 256 megabyte if you prepare your own disk instead of using my image.

Here are the steps for the binary version:

  1. Download the disk image from here
  2. Decompress (bunzip) the disk image, use dd to write to your USB disk
  3. Since there is no boot menu, entering single or multi user mode is done by booting different kernel. Download the multi user kernel or single user kernel and put it in your tftpserver
  4. Boot the kernel

To boot the kernel, you need to access your device using serial port. I think You need to hold the reset button to enter the boot prompt (mine always goes to the boot prompt because Bruce did something with the configuration area). You should see

STR9100>

prompt.

setenv serverip 192.168.1.1
(you can also 'saveenv' to save the TFTP server address permanently)
tftpboot 0x1000000 name-of-kernel.bin
go 0x1000000

To build your own disk image, make an empty disk.img with the size that you want. Goto /usr/src and then (modified from instruction to make i386 image by Warner Losh)

export TARGET_ARCH=arm
make buildworld
mdconfig -a -t vnode -f disk.img
fdisk -I md0
fdisk -B md0
bsdlabel -w md0s1 auto
bsdlabel -B md0s1
newfs /dev/md0s1a
mount /dev/md0s1a /mnt/
make installworld DESTDIR=/mnt
make distrib-dirs DESTDIR=/mnt
make distribution DESTDIR=/mnt
echo /dev/da0s1a / ufs rw 1 1 > /mnt/etc/fstab
echo ifconfig_DEFAULT=DHCP > /mnt/etc/rc.conf
echo hostname=demo >> /mnt/etc/rc.conf

To compare your boot experience here is is the bootlog for the multi user mode, and the single user mode.

For the latest kernel source, you can see the perforce depot at:

http://p4db.freebsd.org/depotTreeBrowser.cgi?FSPC=//depot/projects/str91xx&HIDEDEL=NO

Agestar/CNS11XX Freebsd progress

I’m still working on the Freebsd port, and haven’t tried to fix the network driver problem in Linux (it only happens on samba 3 which I don’t use daily). The reason to focus my work on the FreeBSD port is because I want to understand more about the network driver. The current Linux network driver was not written from scratch but from modifying existing source. The source was full of things that I don’t understand, which proves to be unnecessary after I gain understanding when writing the Freebsd network driver.

Here is the current FreeBSD port status:

  1. Timer is now working, previously the timer tick works, but the time counter was too fast.
  2. EHCI and OHCI is working, but there is still some caching problem, so i need to modify usb_busdma.c, this modification is not clean. I can access USB disks, and USB network adapter.
  3. Network driver works, but it is still very slow . I am still trying to understand better the DMA handling in FreeBSD. There is still one bug: you can not stop the interface and start it again. The stopping part works, ifconfig ece0 down, but the starting again part doesn’t.
  4. Multi user works. I can also activate network services, such as sshd.

I am still waiting for my perforce account. But anyone willing to test it can contact me. I still don’t know the best method to release a patch against CURRENT for people to try, because changes happens very quickly.

Here is the latest boot log: bsd-24-may-2009.txt

Funding Small Open Source Project

I have a small open source project, Symbianbible, a bible reader for the Symbian Platform. This is a small project, with many users, and I am the only developer. Currently, I have ported this application to every Symbian version that Nokia has (Series 60, 1st, 2nd, 3rd, Series 80, Series 90). In this post, I am going to tell the story of how I got the funding to port this program for multiple Symbian platforms.

Since the first release, many people asked, “can you port it to device X?”. Buying every phone models (at least one for each platform) and their accessories (such as memory card, card reader, Bluetooth adapter, etc) is expensive, so I wrote in my FAQ, that I would only port if there are some people that donate or lend me their phone.
Continue reading “Funding Small Open Source Project”

They violated the open source license: What should I do?

I have found at least two programs that violated the GPL. I have contacted the companies that broke the license and they have found a way to work around it. I don’t know if this is the correct way to do it. Would the open source community be interested in “damages” that those company has caused? or just let them switch to non-open source solution, and we’ll forget about their sin?

The two programs that violated the GPL are Windows programs and you can’t see it unless you reverse engineer it. It is just my reflex to reverse engineer a program to know how it works and maybe I should look for more programs to see if they violated anything. But sometimes, I just don’t know what to do with my finding. Any ideas?