How many of you are using STAR 9100 based NAS?

As listed on one of my previous posting, STAR 9100 (to be precise STAR 9104) is being used in these devices:

Coolmax CN-570 http://www.smallnetbuilder.com/content/view/29899/75/1/3/
NS-348S http://www.multicase.de/en/products/76/ns348s.html http://www.enclosureservice.com/
Emprex NSD-100 http://www.emprex.com/02_products_02.php?id=205
Agestar NCB3AHT http://www.agestar.com/english/products/ncb3aht.asp
http://shenztech.com/code/ui/product/product.aspx?prdid=NAS2&subcatid=9
revoltec rs049

We can see from the boot log that says the machine is STAR_STR9100. Lately I have worked less and less on this device, because it has been running smoothly enough for me (I have run it continuously for a week). The last few parts is not so important for me. These four parts are RTC (turns out to be a very limited RTC), LED (only one LED inside the box, which is not very useful), and button (I have never used the button anyway), and Watch dog (this one might be useful, but I don’t have any documentation about this).

I am planning to stop further development. I was planning to build a custom firmware, but I think a full Debian distro is much better for me. But, if there are quite many people that uses this devices and are expecting something like NSLU2 (easy installer, etc), then I might continue the development. So, If you are using Agestar or agestar like devices, please leave a comment, and let me know what you expect.

If I am going to continue the development, I will need to buy another box, because I am currently using this one extensively for my daily activities. Irina (that is the name I gave to my NAS box) is now serving MP3, serving web page, and act as a download station.

RTC on STR9100

I have spent many hours to work on the RTC part, and I decided to give up for now. I have been able to activate the clock, set the clock, and make it run. But the RTC is not useful. First, it is not battery backed, so when you turn off your device, it will not keep the time. Second, it can store only the seconds, minutes, hours, and day of the month. The problem of not having a documentation is sometimes you get stuck, and don’t know what to try next.

There is one feature that is supposed to be useful if I can make it work: the alarm capability. With alarm, some cron-like applications can set to be notified when a particular time comes (it will ease the CPU burden). As far as I know, the cron daemon doesn’t use this feature, so it is not a great loss.

There is one thing that still puzzles me. The original firmware uses X1205 through an I2C bus. From my understanding, the X1205 have different abilities compared to the STR9100 RTC. So I don’t know whether there is actually another RTC on the board.

Since the RTC is not very useful. I will let go hacking this part until I find other clues.

Here is the output of the original firmware.

X1205: I2C based RTC driver.
i2c-core.o: driver X1205 registered.
X1205: found X1205 on STR9100 I2C Adapter
ccr_write_enable: verify SR failed
i2c-core.o: client [X1205] registered to adapter [STR9100 I2C Adapter](pos. 0).
X1205: i2c_add_driver RTC driver.
X1205: misc_register RTC driver.

P990i Stylus Stuck

Sony Ericsson P990 Stylus It had been several months since my Sony Ericsson P990 stylus got stuck inside the casing. I was a little bit annoyed, since I can’t put a new stylus in it, but didn’t care too much because most of the time I just use my hand to select the menu, and use the keyboard to enter text.

When I bought a Torx T6 screw driver to replace MacBook Pro’s hard drive, I realized that the same screwdriver can be used to open P990i casing. So, I opened the casing, and I can pull out the old stylus. The stylus was stuck in a spring mechanism which I guess used to prevent the stylus from falling to easily.

You can look the disassembly pictures at
my photo album.

One thing that may not be clear from the instructions on the Internet is this: To open the part that covers the front camera: pull it upward (that is toward the upper side of the phone).

Changing MacBook Pro Harddrive

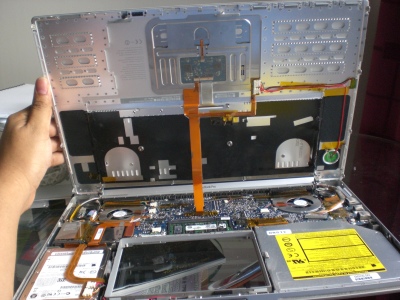
Changing MacBook hard drive was very easy, and I thought that changing a MacBook Pro hard disk will also be easy. It turns out that I had to deal with 27 screws, some of them are Philips-head screw type, and some others are Torx screw type. Thankfully the guys at iFixit has made a wonderful tutorial.

I didn’t have a Torx T6 screwdriver, so I had to buy one. Unfortunately, I can’t find a single screwdriver for Torx T6, so I have to buy a set, which cost me 120 baht (about 3.5 USD). The process was relatively easy and takes about 30 or 40 minutes. If you don’t have the time or patience to do it, just remember that next time you want to upgrade your MacBook Pro hard drive, you should take it to the store (especially if your MacBook Pro is still under warranty).

As a tip: I use my digital camera to take pictures of every step, In case I forgot what is the previous state of the things I take apart.

Here are the photos that I took when replacing the hard drive: http://www.flickr.com/photos/yohanes/sets/72157619774176803/

LED driver

I was very tired lately because I have to do many other things beside hacking the agestar kernel. So when I have time this morning, I decided to work on the easiest part on my list: LED driver. Agestar NCB3AST only have one controllable led, inside the casing, so I don’t know how useful this is (I think you can peek a little bit when the casing is closed). The LED and LCD display front is actually controlled by different unit, not controllable by CPU. Because this part is not important, I decided to upload the patch later.

Right now I am starting to look at the RTC driver. Hopefully this one will be more useful.

Network Driver Problem Solved

I ported STAR 9100 network driver without a documentation, I just blindly use the old driver and modify it to fit with all of the changes in the networking stuff since kernel 2.4.27. The driver claims to support scatter/gather I/O, but there is no implementation of scatter gather I/O in the hard_start_xmit function. I don’t know whether this device supports it or not, so I just change this line:

dev->features |= NETIF_F_SG|NETIF_F_IP_CSUM

to this:

dev->features |= NETIF_F_IP_CSUM

http://tinyhack.com/agestar/patch-2.6.25.4-for-agestar-20080622.bz2

And now the sendfile function works (although it would be faster if the driver supports scatter/gather IO).

My Network driver is buggy, sendfile() syscall doesn’t work

I have concluded the source of failure for many applications is that the sendfile syscall on my port doesn’t work. To be precise, sendfile sends garbage data to the other side. I have an USB to Ethernet adapter, and using that adapter, the problem disappears. So the conclusion is that my network driver is buggy.

Applications that might be affected are: network servers that sends file (http servers, file servers, etc), distcc.

I will try to fix this tomorrow.

Debian Installation

This is the latest patch (add NAPI to the network driver):
http://tinyhack.com/agestar/patch-2.6.25.4-for-agestar-20080621.bz2

I have uploaded the instruction on how to install Debian on Agestar NCB3AST at:

http://tinyhack.com/agestar/

I am also testing exposing my Agestar NCB3AST to the world, I have installed a web server on my device. The same information above can be accessed at:

http://irina.homelinux.com/

Please note that the later URL may not always available. First, my bandwidth is limited, and second, sometimes I still develop and/or test something on it that needs restarting the device.

Debian Etch on Agestar NCB3AST

Powered By DebianFirst the bad news: the network driver in the new kernel is not performing very well, if i remember correctly, this is about twice slower than the original kernel. The maximum speed is around 2.75 mb/s for FTP , 1.4-1.50 mb/s for SAMBA, and 618 kb/s for SSHFS. I have tried implementing NAPI (I will upload the patch soon), but it doesn’t help very much. I have tried to optimize the kernel settings, but no luck so far.

Now, the good news: I have been able to install Debian Etch for ARM in my Agestar using the instruction in here: http://wiki.dns323.info/howto:install_debian. Of course there are differences in booting, and configuring stuff, but the steps to produce the root file system are the same. I have also managed to write new kernel to the flash (by using dd if=bootpImage of=/dev/mtdblock1), so now my agestar will go directly to Debian when i turned it on.

I will clean up the code, and write the instruction on how to install Debian this weekend.

Latest patch for Agestar NCB3AST

ncb3ast

It seems I can get the userland working fine with the latest uClibc snapshot. So far I have been able to boot the kernel using TFTP, and uses root image from NFS and USB, tonight I think I will try to flash the kernel using the mtd driver (for those of you who wants to try before me, flash /dev/mtd1 and use bootpImage for that mtd partition).

Here is the latest patch against 2.6.25.4 (with mtd driver):
patch-2.6.25.4-for-agestar-20080618.bz2

Config file for booting with USB root file system. I am using external USB stick (/dev/sdb1) change it to /dev/sdaX to use the hard disk inside Agestar.

Config file for booting NFS root file system. Don’t forget to change the client IP address (mine is 192.168.1.244), server IP address (mine is 192.168.1.150) and the mount path (mine is /opt/boot).