A bricked Xiaomi phone led me to discover a project in Github that uses a MediaTek BootROM exploit that was undocumented. The exploit was found by Xyz, and implemented by Chaosmaster. The initial exploit was already available for quite a while. Since I have managed to revive my phone, I am documenting my journey to revive it and also explains how the exploit works. This exploit allows unsigned code execution, which in turn allows us to read/write any data from our phone.
For professionals: you can just skip to how the BootROM exploit works (spoiler: it is very simple). This guide will try to guide beginners so they can add support for their own phones. I want to show everything but it will violate MediaTek copyright, so I will only snippets of decompilation of the boot ROM.

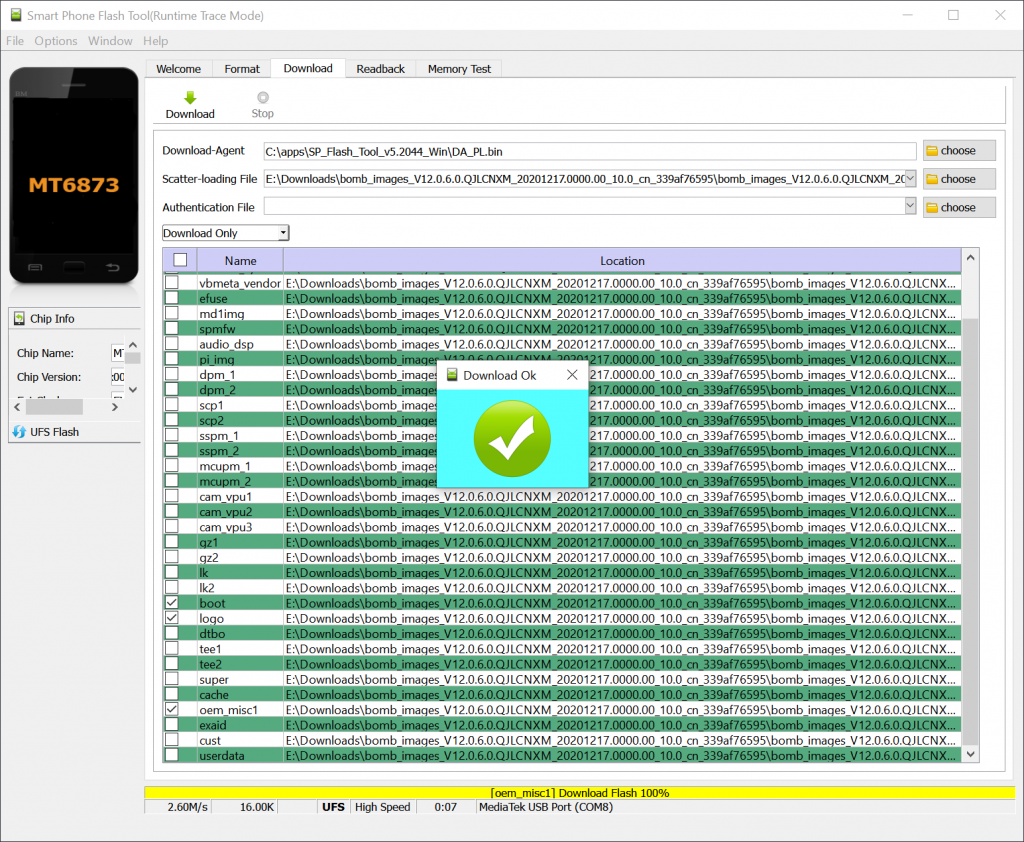
Bricking my Phone and understanding SP Flash Tool
I like to use Xiaomi phones because it’s relatively cheap, has an easy way to unlock the bootloader, and the phone is easy to find here in Thailand. With an unlocked bootloader, I have never got into an unrecoverable boot loop, because I can usually boot into fastboot mode and just reflash with the original ROM. I usually buy a phone with Qualcomm SOC, but this time I bought Redmi 10X Pro 5G with MediaTek SOC (MT6873 also known as Dimensity 800). But it turns out: you can get bricked without the possibility to enter fastboot mode.
A few years ago, it was easy to reflash a Mediatek phone: enter BROM mode (usually by holding the volume up button and plugging the USB when the phone is off), and use SP Flash Tool to overwrite everything (including boot/recovery partition). It works this way: we enter BROM mode, the SP Flash Tool will upload DA (download agent) to the phone, and SP Flash Tool will communicate with the DA to perform actions (erase flash, format data, write data, etc).
But they have added more security now: when I tried flashing my phone, it displays an authentication dialog. It turns out that this is not your ordinary Mi Account dialog, but you need to be an Authorized Mi Account holder (usually from a service center). It turns out that just flashing a Mediatek phone may enter a boot loop without the possibility of entering fastboot mode. Quoting from an XDA article:
The developers who have been developing for the Redmi Note 8 Pro have found that the device tends to get bricked for a fair few reasons. Some have had their phone bricked when they were flashing to the recovery partition from within the recovery, while others have found that installing a stock ROM through fastboot on an unlocked bootloader also bricks the device
Xiaomi needs a better way to unbrick its devices instead of Authorized Mi Accounts
I found one of the ROM modders that had to deal with a shady person on the Internet using remote Team Viewer to revive his phone. He has some explanation about the MTK BootROM security. To summarize: BROM can have SLA (Serial Link Authorization), DAA (Download Agent Authorization), or both. SLA prevents loading DA if we are not authorized. And DA can present another type of authentication. Using custom DA, we can bypass the DA security, assuming we can bypass SLA to allow loading the DA.
When I read those article I decided to give up. I was ready to let go of my data.
MTK Bypass
By a stroke of luck, I found a bypass for various MTK devices was published just two days after I bricked my Phone. Unfortunately: MT6873 is not yet supported. To support a device, you just need to edit one file (device.c), which contains some addresses. Some of these addresses can be found from external sources (such as from the published Linux kernel for that SOC), but most can’t be found without access to the BootROM itself. I tried reading as much as possible about the BROM protocol. Some of the documentation that I found:
- MediaTek details: SoC startup: has a link to BROM documentation
- Support for Mediatek Devices in Oxygen Forensic® Detective (Explains about BROM protection)
Another luck came in a few days later: Chaosmaster published a generic payload to dump the BootROM. I got lucky: the generic payload works immediately on the first try on my phone and I got my Boot ROM dump. Now we need to figure out what addresses to fill in. At this point, I don’t have another ROM to compare, so I need to be clever in figuring out these addresses. We need to find the following:
send_usb_responseusbdl_put_dwordusbdl_put_datausbdl_get_datauart_reg0uart_reg1sla_passedskip_auth_1skip_auth_2
From the main file that uses those addresses we can see that:
uart_reg0anduart_reg1are required for proper handshake to work. These addresses can be found on public Linux kernel sources.usbdl_put_dwordandusbdl_put_datais used to send data to our computerusbdl_get_datais used to read data from computersla_passed,skip_auth_1andskip_auth_2, are the main variables that we need to overwrite so we can bypass the authentication
We can start disassembling the firmware that we obtain fro the generic dumper. We need to load this to address 0x0. Not many strings are available to cross-reference so we need to get creative.
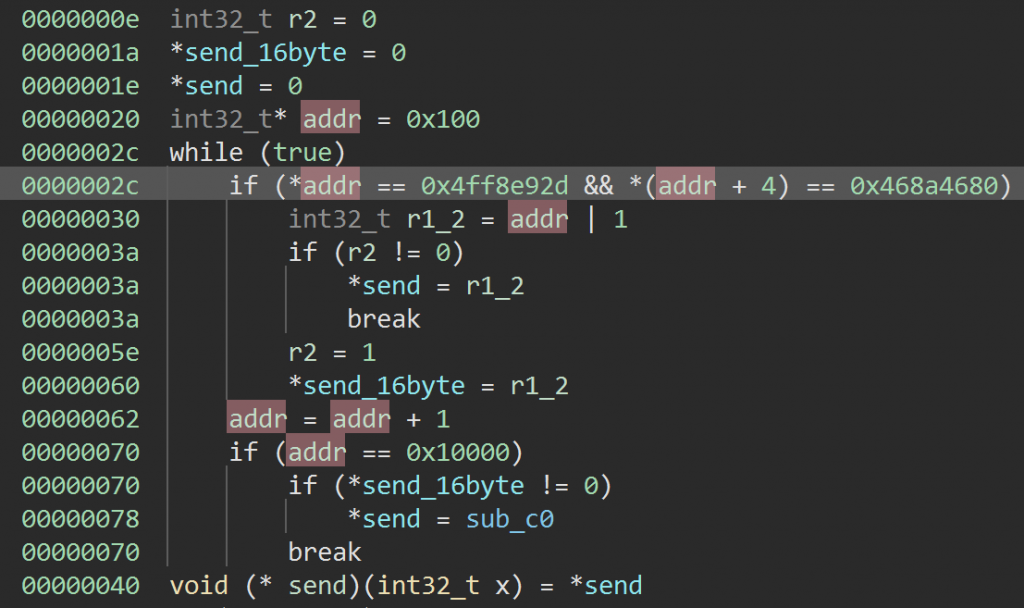
Somehow generic_dump_payload can find the address for usb_put_data to send dumped bytes to the Python script. How does it know that? The source for generic_dump_payload is is available in ChaosMaster’s repository. But I didn’t find that information sooner so I just disassembled the file. This is a small binary, so we can reverse engineer it easily using binary ninja. It turns out that it does some pattern matching to find the prolog of the function: 2d e9 f8 4f 80 46 8a 46. Actually, it searches for the second function that has that prolog.

Now that we find the send_word function we can see how sending works. It turns out that it sends a 32-bit value by sending it one byte at a time. Note: I tried continuing with Binary Ninja, but it was not easy to find cross-references to memory addresses on a raw binary, so I switched to Ghidra. After cleaning up the code a bit, it will look something like this:

Now we just need to find the reference to function_pointers and we can find the real address for sendbyte. By looking at related functions I was able to find the addresses for: usbdl_put_dword, usbdl_put_data, usbdl_get_data. Note that the exploit can be simplified a bit, by replacing usbdl_put_dword by a call to usbdl_put_data so we get 1 less address to worry about.
The hardest part for me was to find send_usb_response to prevent a timeout. From the main file, I know that it takes 3 numeric parameters (not pointers), and this must be called somewhere before we send data via USB. This narrows it down quite a lot and I can find the correct function.
Now to the global variables: sla_passed, skip_auth_1, and skip_auth_2. When we look at the main exploit in Python, one of the first things that it does is to read the status of the current configuration. This is done by doing a handshake then retrieve the target config.

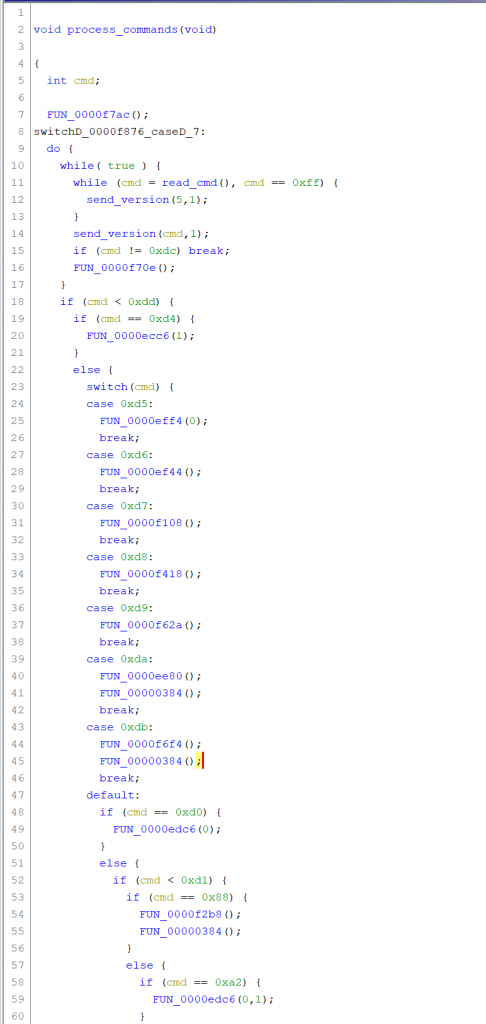
There must be a big “switch” statement in the boot ROM that handles all of these commands. We can find the handshake bytes (A0 0A 50 05) to find the reference to the handshake routine (actually found two of them, one for USB and one for UART). From there we can find the reference to the big switch statement.

You should be able to find something like this: after handshake it starts to handle commands

And the big switch should be clearly visible.

Now that we found the switch, we can find the handler for command 0xd8 (get target config). Notice in python, the code is like this:

By looking at the bitmask, we can conclude the name of the functions that construct the value of the config. E.g: we can name the function that sets the secure boot to is bit_is_secure_boot. Knowing this, we can inspect each bit_is_sla and bit_is_daa

For SLA: we need to find cross-references that call bit_is_sla, and we can see that another variable is always consulted. If SLA is not set, or SLA is already passed, we are allowed to perform the next action.

Now we need to find two more variables for passing DAA. Looking at bit_is_daa, we found that at the end of this function, it calls a routine that checks if we have passed it. These are the last two variables that we are looking for.

How the BootROM Exploit Works
The exploit turns out very simple.
- We are allowed to upload data to a certain memory space
- The handler for USB control transfer blindly index a function pointer table
Basically it something like this: handler_array[value*13]();
But there are actually some problems:
- The value for this array is unknown, but we know that most devices will have 0x100a00 as one of the elements
- We can brute force the value for USB control transfer to invoke the payload
- We may also need to experiment with different addresses (since not all device has 0x100a00 as an element that can be used)
Another payload is also provided to just restart the device. This will make it easy to find the correct address and control value.
Closing Remarks
Although I was very upset when my phone got bricked, the experience in solving this problem has been very exciting. Thank you to Xyz for finding this exploit, and ChaosMaster for implementing it, simplifying it, and also for answering my questions and reviewing this post.