Patching .so files of an installed Android App

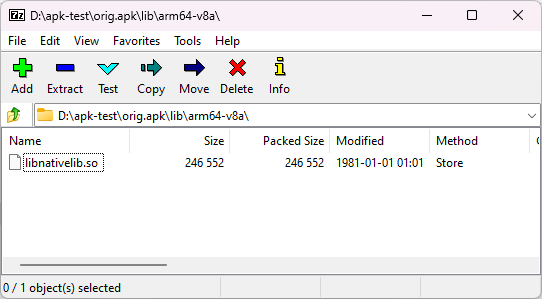
If we installed an Android APK and we have a root access, we can modify the .so (native) filesof that app without altering the signature. This is true even if extractNativeLibs is set to false in AndroidManifest.xml. We can also patch the AOT compiled file (ODEX/VDEX) without changing the package signature, but that’s another story, I am just going to focus on the native code.

native libraries are stored uncompressed and page aligned

As a note: this is not a vulnerability, it requires root access. This method was discussed in the Mystique exploit presentation (2022). I just want to show that this is useful for pentest purpose, with an extra tip of how to write binary patch in C.

Background

I was doing a pentest on an Android app with a complex RASP. There are many challenges:

  • If I unpack the APK file and repack it, it can detect the signature change
  • If I use Frida, it can detect Frida in memory, even when I change the name using fridare
  • It can detect Zygisk, so all injection methods that use Zygisk are detected
  • It can detect hooks on any function, not just PLT. It seems that it is done by scanning the prologue of functions to see if it jumps to a location outside the binary; the app developer needs to call this check manually (this is quite an expensive operation), which is usually done before it performs some critical scenario.
  • The RASP uses a native library, which is obfuscated

Given enough time, I am sure it is possible to trace and patch everything, but we are time-limited, and I was only asked to check a specific functionality.

When looking at that particular functionality, I can see that it is implemented natively in a non-obfuscated library. In this specific case, If I can patch the native code without altering the signature, I don’t need to deal with all the anti-frida, anti-hook, etc.

Continue reading “Patching .so files of an installed Android App”

Extracting WhatsApp Database (or any app data) from Android 12/13 using CVE-2024-0044

I want to make a WhatsApp message backup from a non-rooted Android 12 Phone. A few years ago, I used Whatsapp-Chat-Exporter to convert the backup to HTML, but first, I had to extract the database from the phone.

The method pointed out by Whatsapp-Chat-Exporter to extract from non-root has remained the same for many years: downgrade to an old version of WhatsApp that allows backup, then create an Android backup that contains the WhatsApp database.

This doesn’t work for WhatsApp for Business because there was no version that allowed backup. Depending on your use case, you might be able to move WhatsApp to a new device that can be rooted and then extract the files there (very easy when you have root access).

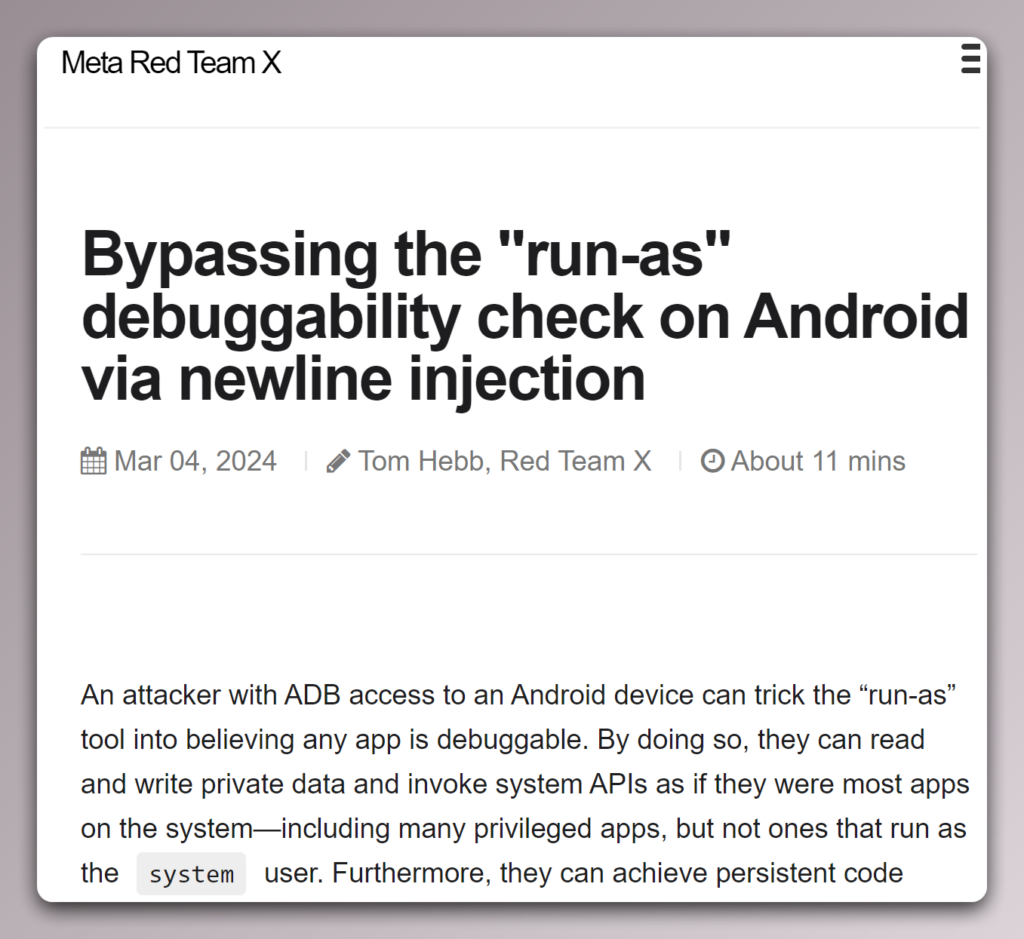
When looking at the new Zygote Bug by Meta Red Team X (CVE-2024-31317), I thought it could be used to perform backup extraction, but then I saw the previous entry on that blog (CVE-2024-0044), which is much easier to use (but only works in Android 12 and 13 that has not received Marh 2024 security update).

CVE-2023-0044

This exploit can work for any non-system app, not just for extracting data from WhatsApp/WhatsApp business. For an expert, the explanation for the exploit is very obvious. I am writing here for end users or beginners who need a step-by-step guide to extracting their WA database.

Continue reading “Extracting WhatsApp Database (or any app data) from Android 12/13 using CVE-2024-0044”

Zygisk-based reFlutter

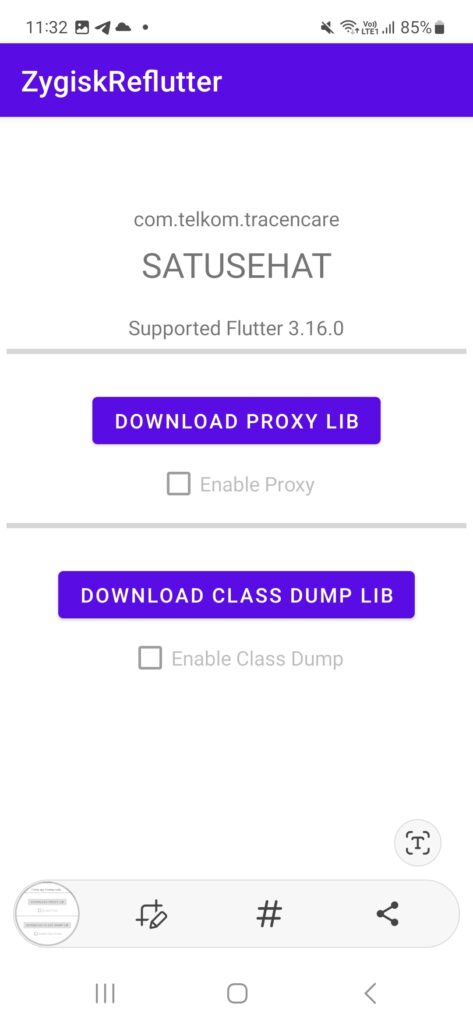
I developed a Zygisk module for rooted Android phones with Magisk (and Zygisk enabled). This module allows you to “reFlutter” your Flutter App at runtime, simplifying the testing and reverse engineering processes.

If you don’t want to read the detail, the release is available at:

https://github.com/yohanes/zygisk-reflutter

Continue reading “Zygisk-based reFlutter”

Using U-Boot to extract Boot Image from Pritom P7

This is a guide to extract the boot image from a cheap Android tablet based on Allwinner A133 using U-Boot (accessed via UART). The original firmware was not found on the internet. With the boot image and Magisk, you can root your Android tablet to make it more useful.

Pritom P7 is a very cheap Android tablet. I bought it for 33 USD from AliExpress, but it can be found for as low as 27 USD. This is a Google GMS-certified device (it passes Play Integrity, no malware was found when I received it), and it uses 32-bit Android Go. I am only using this to test some 32-bit Android app compatibility.

I bought it for 32.75 USD

They may have several variants of this model with different specifications. Mine is: Alwinner A133, 1.5GB RAM (advertised as 2GB, and shown as 2GB in the Android info), 32 GB ROM, only 2.4 GHz WIFI, no GPS.

Unlockable Bootloader

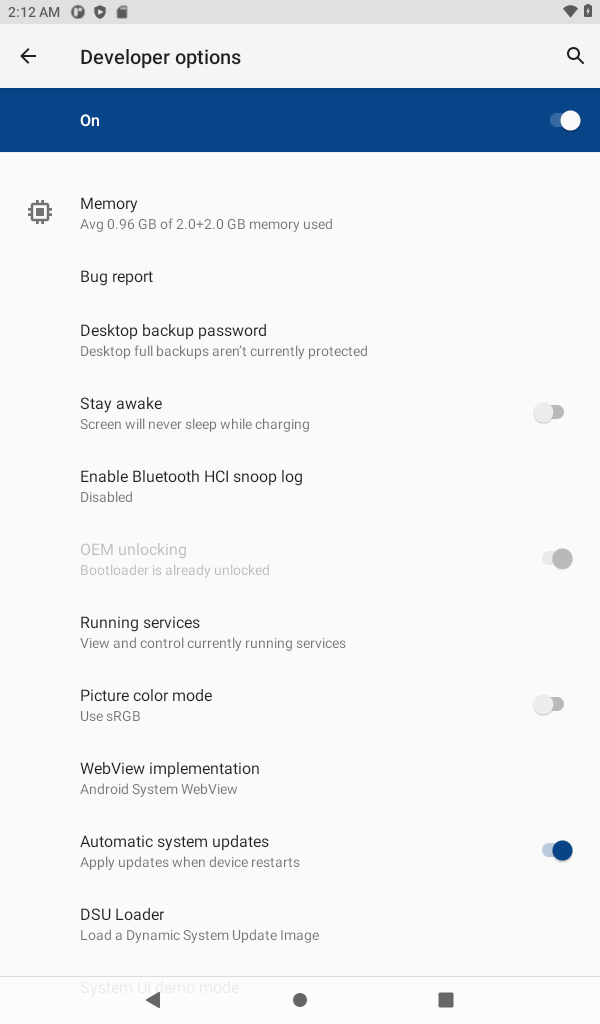
Luckily, we are allowed to unlock the bootloader of this device using the developer menu, adb reboot bootloader then using fastboot oem unlock. Some cheap Android devices don’t allow unlocking (for example, the ones that are based on recent Unisoc SOC).

I can allow bootloader unlock using the OEM Unlocking option

The product ID of my tablet is P7_EEA (Android 11) with kernel version Linux localhost 5.4.180-svn33409-ab20220924-092422 #28 SMP PREEMPT Sun Aug 20 19:13:45 CST 2023 armv8l. The build number is PRITOM_P7_EEA_20230820.

I did not find any Android exploit for this device, and I also didn’t find any backdoors. From my experience, some of these cheap Android devices have hidden su backdoors. Unable to find an exploit, I gave up trying to extract boot image from user space.

With some SOC, you can easily read/dump/extract the flash using PC software. I didn’t find any software for this Allwinner chip. An example of a SOC that allows flash reading is Unisoc (formerly Spreadtrum), but on the other hand, the bootloader on phones and tablets with the latest SOCs from Unisoc (that I know of) is not unlockable.

UART

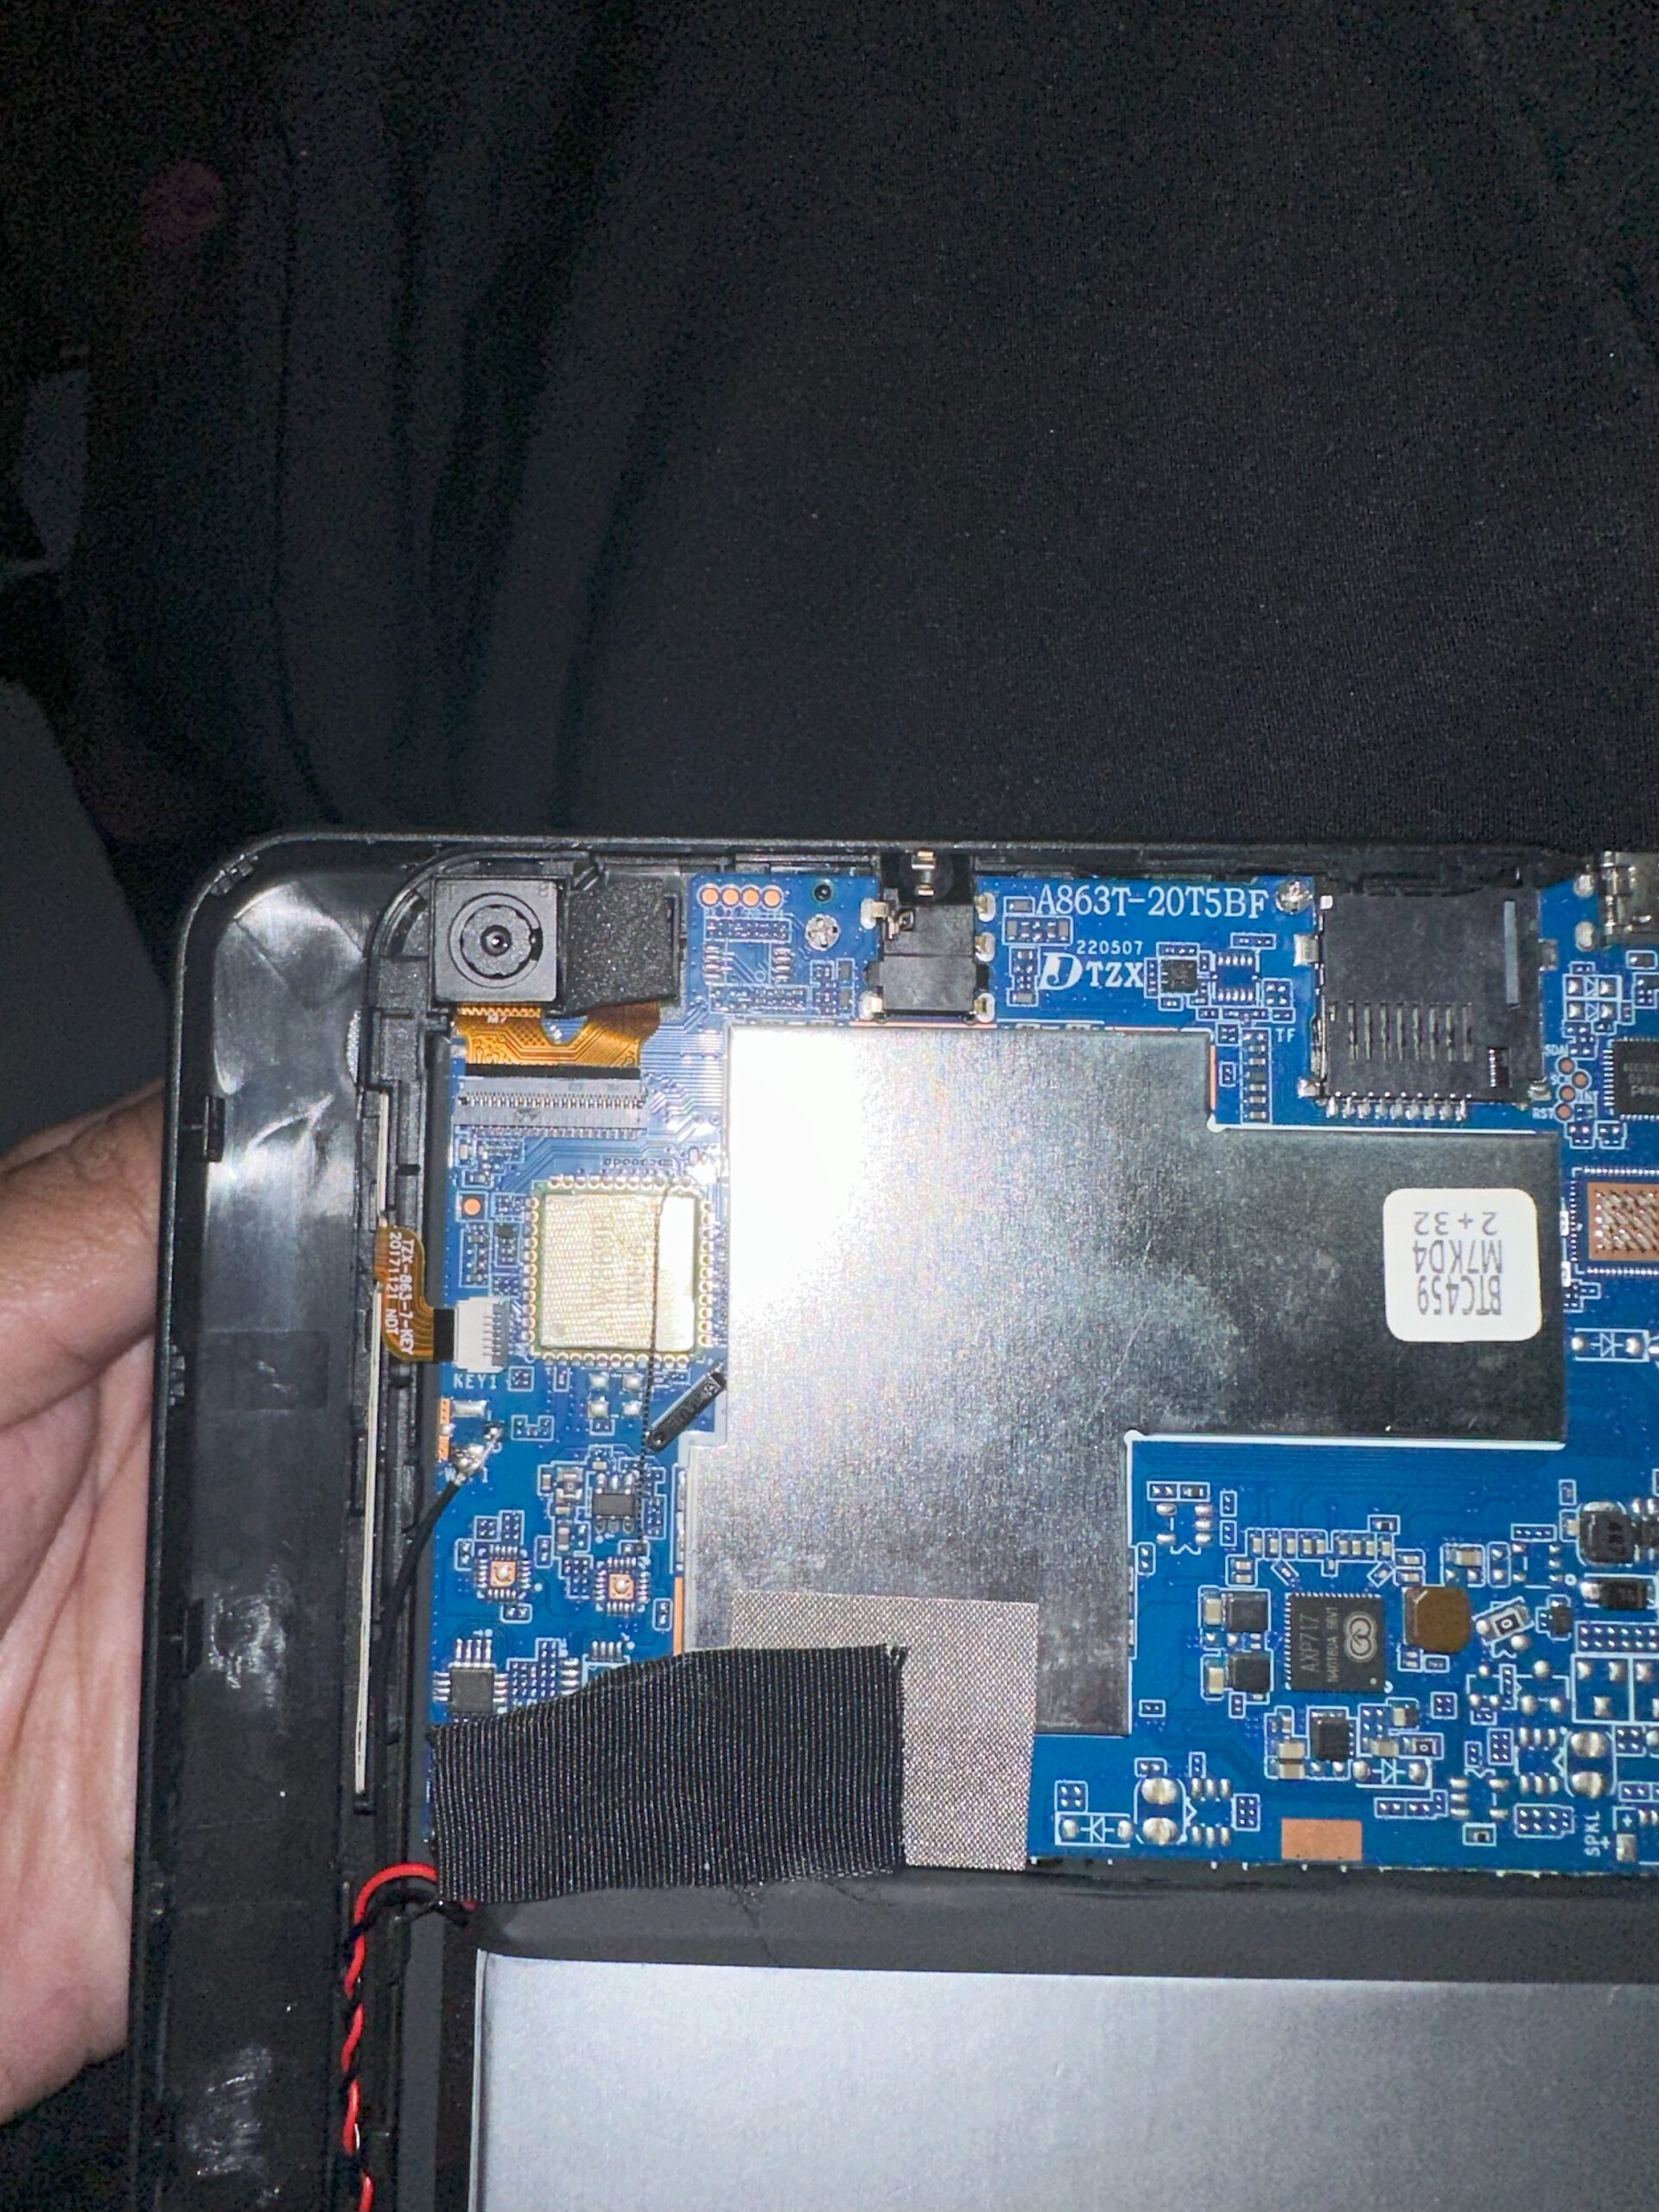
Fortunately, this device is easy to open, and a UART pin is on the top left near the camera.

UART + FEL pad on top, near the camera
Continue reading “Using U-Boot to extract Boot Image from Pritom P7”

Reverse Engineering a Flutter app by recompiling Flutter Engine

It is not easy to reverse engineer a release version of a flutter app because the tooling is not available and the flutter engine itself changes rapidly. As of now, if you are lucky, you can dump the classes and method names of a flutter app using darter or Doldrums if the app was built with a specific version of Flutter SDK.

If you are extremely lucky, which is what happened to me the first time I needed to test a Flutter App: you don’t even need to reverse engineer the app. If the app is very simple and uses a simple HTTPS connection, you can test all the functionalities using intercepting proxies such as Burp or Zed Attack Proxy. The app that I just tested uses an extra layer of encryption on top of HTTPS, and that’s the reason that I need to do actual reverse engineering.

In this post, I will only give examples for the Android platform, but everything written here is generic and applicable to other platforms. The TLDR is: instead of updating or creating a snapshot parser, we just recompile the flutter engine and replace it in the app that we targeted.

Flutter compiled app

Currently several articles and repositories that I found regarding Flutter reverse engineering are:

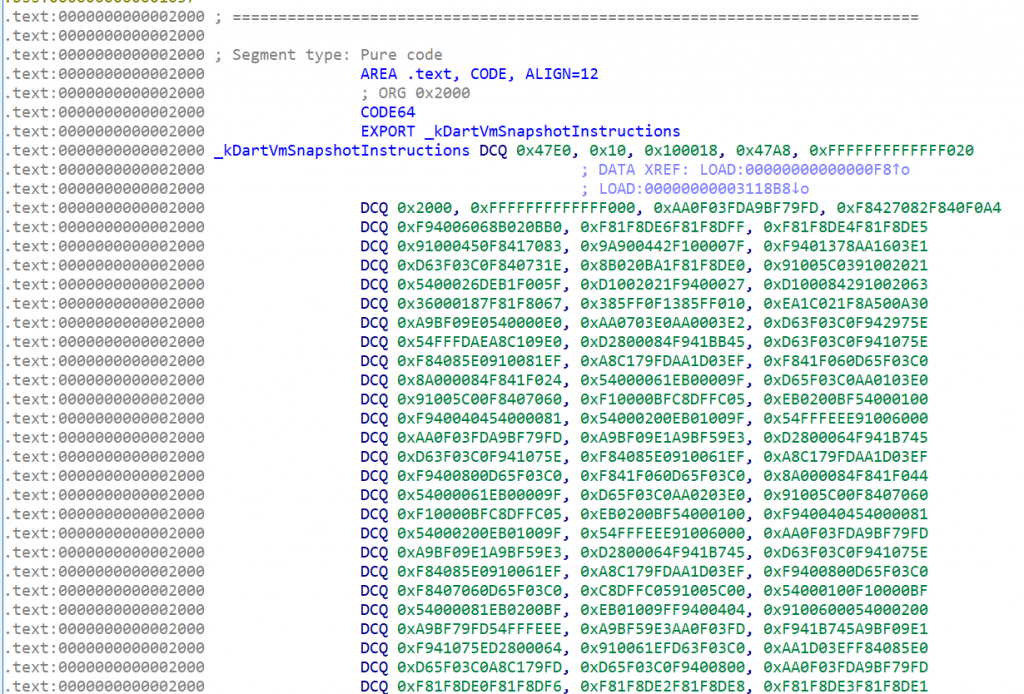
The main code consists of two libraries libflutter.so (the flutter engine) and libapp.so (your code). You may wonder: what actually happens if you try to open a libapp.so (Dart code that is AOT compiled) using a standard disassembler. It’s just native code, right? If you use IDA, initially, you will only see this bunch of bytes.

If you use other tools, such as binary ninja which will try to do some linear sweep, you can see a lot of methods. All of them are unnamed, and there are no string references that you can find. There is also no reference to external functions (either libc or other libraries), and there is no syscall that directly calls the kernel (like Go)..

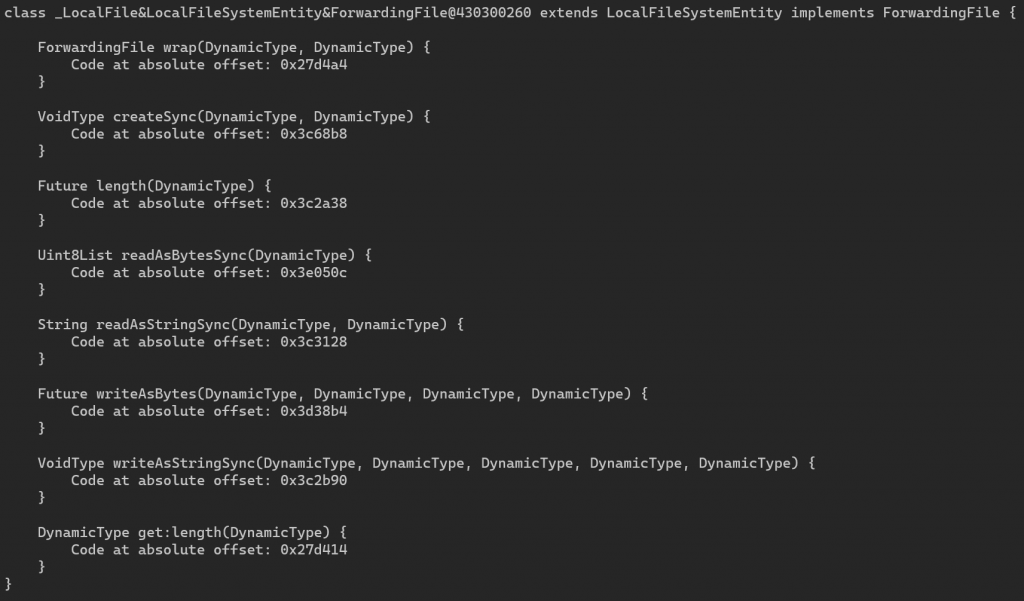
With a tool like Darter dan Doldrums, you can dump the class names and method names, and you can find the address of where the function is implemented. Here is an example of a dump using Doldrums. This helps tremendously in reversing the app. You can also use Frida to hook at these addresses to dump memory or method parameters.

The snapshot format problem

The reason that a specific tool can only dump a specific version of the snapshot is: the snapshot format is not stable, and it is designed to be run by a specific version of the runtime. Unlike some other formats where you can skip unknown or unsupported format, the snapshot format is very unforgiving. If you can’t parse a part, you can parse the next part.

Basically, the snapshot format is something like this: <tag> <data bytes> <tag> <data bytes> … There is no explicit length given for each chunk, and there is no particular format for the header of the tag (so you can’t just do a pattern match and expect to know the start of a chunk). Everything is just numbers. There is no documentation of this snapshot, except for the source code itself.

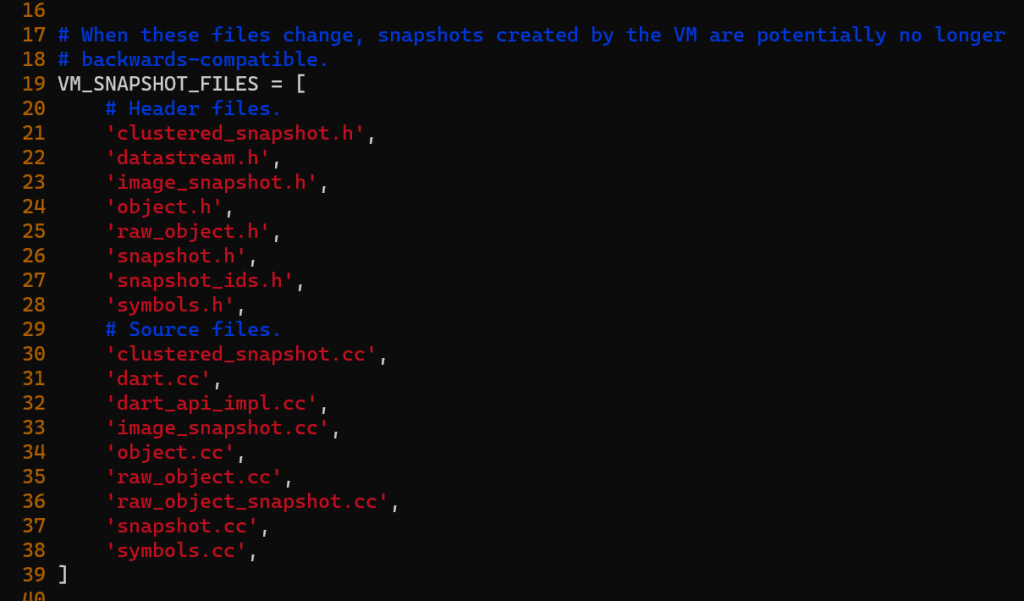
In fact, there is not even a version number of this format. The format is identified by a snapshot version string. The version string is generated from hashing the source code of snapshot-related files. It is assumed that if the files are changed, then the format is changed. This is true in most cases, but not always (e.g: if you edit a comment, the snapshot version string will change).

My first thought was just to modify Doldrums or Darter to the version that I needed by looking at the diff of Dart sources code. But it turns out that it is not easy: enums are sometimes inserted in the middle (meaning that I need to shift all constants by a number). And dart also uses extensive bit manipulation using C++ template. For example, when I look at Doldums code, I saw something like this:

def decodeTypeBits(value):
       return value & 0x7f

I thought I can quickly check this constant in the code (whether it has changed or not in the new version), the type turns out to be not a simple integer.

class ObjectPool : public Object {
 using TypeBits = compiler::ObjectPoolBuilderEntry::TypeBits;
}
struct ObjectPoolBuilderEntry {
  using TypeBits = BitField<uint8_t, EntryType, 0, 7>;
}

You can see that this Bitfield is implemented as BitField template class. This particular bit is easy to read, but if you see kNextBit, you need to look back at all previous bit definitions. I know it’s not that hard to follow for seasoned C++ developers, but still: to track these changes between versions, you need to do a lot of manual checks.

My conclusion was: I don’t want to maintain the Python code, the next time the app is updated for retesting, they could have used a newer version of Flutter SDK, with another snapshot version. And for the specific work that I am doing: I need to test two apps with two different Flutter versions: one for something that is already released in the app store and some other app that is going to be released.

Rebuilding Flutter Engine

The flutter engine (libflutter.so) is a separate library from libapp.so (the main app logic code), on iOS, this is a separate framework. The idea is very simple:

  • Download the engine version that we want
  • Modify it to print Class names, Methods, etc instead of writing our own snapshot parser
  • Replace the original libflutter.so library with our patched version
  • Profit

The first step is already difficult: how can we find the corresponding snapshot version? This table from darter helps, but is not updated with the latest version. For other versions, we need to hunt and test if it has matching snapshot numbers. The instruction for recompiling the Flutter engine is here, but there are some hiccups in the compilation and we need to modify the python script for the snapshot version. And also: the Dart internal itself is not that easy to work with.

Most older versions that I tested can’t be compiled correctly. You need to edit the DEPS file to get it to compile. In my case: the diff is small but I need to scour the web to find this. Somehow the specific commit was not available and I need to use a different version. Note: don’t apply this patch blindly, basically check these two things:

  • If a commit is not available, find nearest one from the release date
  • If something refers to a _internal you probably should remove the _internal part.
diff --git a/DEPS b/DEPS
index e173af55a..54ee961ec 100644
--- a/DEPS
+++ b/DEPS
@@ -196,7 +196,7 @@ deps = {
    Var('dart_git') + '/dartdoc.git@b039e21a7226b61ca2de7bd6c7a07fc77d4f64a9',

   'src/third_party/dart/third_party/pkg/ffi':
-   Var('dart_git') + '/ffi.git@454ab0f9ea6bd06942a983238d8a6818b1357edb',
+   Var('dart_git') + '/ffi.git@5a3b3f64b30c3eaf293a06ddd967f86fd60cb0f6',

   'src/third_party/dart/third_party/pkg/fixnum':
    Var('dart_git') + '/fixnum.git@16d3890c6dc82ca629659da1934e412292508bba',
@@ -468,7 +468,7 @@ deps = {
   'src/third_party/android_tools/sdk/licenses': {
      'packages': [
        {
-        'package': 'flutter_internal/android/sdk/licenses',
+        'package': 'flutter/android/sdk/licenses',
         'version': 'latest',
        }
      ],

Now we can start editing the snapshot files to learn about how it works. But as mentioned early: if we modify the snapshot file: the snapshot hash will change, so we need to fix that by returning a static version number in third_party/dart/tools/make_version.py. If you touch any of these files in VM_SNAPSHOT_FILES, change the line snapshot_hash = MakeSnapshotHashString() with a static string to your specific version.

What happens if we don’t patch the version? the app won’t start. So after patching (just start by printing a hello world) using OS::PrintErr("Hello World") and recompiling the code, we can test to replace the .so file, and run it.

I made a lot of experiments (such as trying to FORCE_INCLUDE_DISASSEMBLER), so I don’t have a clean modification to share but I can provide some hints of things to modify:

  • in runtime/vm/clustered_snapshot.cc we can modify Deserializer::ReadProgramSnapshot(ObjectStore* object_store) to print the class table isolate->class_table()->Print()
  • in runtime/vm/class_table.cc we can modify void ClassTable::Print() to print more informations

For example, to print function names:

 const Array& funcs = Array::Handle(cls.functions());  
 for (intptr_t j = 0; j < funcs.Length(); j++) {
      Function& func = Function::Handle();
      func = cls.FunctionFromIndex(j);
      OS::PrintErr("Function: %s", func.ToCString());
}

Sidenote: SSL certificates

Another problem with Flutter app is: it won’t trust a user installed root cert. This a problem for pentesting, and someone made a note on how to patch the binary (either directly or using Frida) to workaround this problem. Quoting TLDR of this blog post:

  • Flutter uses Dart, which doesn’t use the system CA store
  • Dart uses a list of CA’s that’s compiled into the application
  • Dart is not proxy aware on Android, so use ProxyDroid with iptables
  • Hook the session_verify_cert_chain function in x509.cc to disable chain validation

By recompiling the Flutter engine, this can be done easily. We just modify the source code as-is (third_party/boringssl/src/ssl/handshake.cc), without needing to find assembly byte patterns in the compiled code.

Obfuscating Flutter

It is possible to obfuscate Flutter/Dart apps using the instructions provided here. This will make reversing to be a bit harder. Note that only the names are obfuscated, there is no advanced control flow obfuscation performed.

Conclusion

I am lazy, and recompiling the flutter engine is the shortcut that I take instead of writing a proper snapshot parser. Of course, others have similar ideas of hacking the runtime engine when reversing other technologies, for example, to reverse engineer an obfuscated PHP script, you can hook eval using a PHP module.

Pentesting obfuscated Android App

I just finished pentesting a mobile app for a financial institution. I wrote this mainly as a note for future manual deobfuscation work. I have read a lot of articles and tested tools to deobfuscate Android apps but they are mostly for analyzing malware. Sometimes I need to deobfuscate and test app for the pentesting purpose.

Most of the time it doesn’t matter whether we are analyzing malware or analyzing some apps, but there are differences. For example, when testing a bank or financial app (with a team):

  • We can be sure that the app is not malicious, so we can safely use real device
  • The obfuscation is usually only up to DEX level, and will not patch the native code (Dalvik VM), because they want to ensure portability
  • We need to be able to run and test the app, not just extract strings to guess the capability of the app (on some malware analysis, you just need to extract strings)
  • Sometimes we need to modify and repack the app to bypass root checking, SSL pinning, etc and redistribute the APK to team members (you don’t usually repack a malware APK for testing)

You may ask: if this is for pentesting, why don’t you just ask for the debug version of the app? In many cases: yes we can have it, and it makes our job really easy. In some cases, due to a contract between the bank and the app vendor (or some other legal or technical reasons), they can only give a Play Store or iTunes URL.

I can’t tell you about the app that I tested, but I can describe the protection used.

Try automated tools

Before doing anything manually, there are several deobfuscator tools and website that can help many obfuscation cases. One of them is APK Deguard. It only works with APK file up to 16 Mb, so if you have a lot of asset files, just delete the assets to get within the limit. This tool can recognize libraries, so you will sometimes get perfectly reconstructed method and class names. Unfortunately, there are also bugs: some variables are methods just disappear from a class. And sometimes it generates classes with 4 bytes in size (just the word: null).

I tried several other tools that looked promising, such as simplify (really promising, but when I tested it, it’s really slow). I also tried: Dex-Oracle (it didn’t work). JADX also has some simple renamer for obfuscated names, but it was not enough for this case.

Every time I found a tool that doesn’t work, I usually spend some time to see if I can make it work. In the end, sometimes manual way is the best.

Use XPosed Framework

In some cases, using XPosed framework is nice, I can log any methods, or replace existing methods. One thing that I don’t quite like is that we need to do reboot (or soft reboot) every time we update the modules.

There are also modules such as JustTrustMe that works with many apps to bypass SSL Pinning check. But it doesn’t work with all apps. For example, last time I checked didn’t work for Instagram (but of course, someone could have patched it now to make it work again).  RootCloak also works to hide root from most apps, but this module hasn’t been updated for quite some time.

Sadly for the app that I tested, both tools didn’t work, the app was still able to detect that the device is rooted, and SSL pinning is still not bypassed.

Use Frida

Frida is also an interesting tool that works most of the time. Some interesting scripts were already written or Frida, for example: appmon.

Both Frida and XPosed have a weakness in tracing execution inside a method. For example we cant print a certain value in the middle of a method.

Unpack and Repack

This is the very basic thing: we will check whether the app checks for its own signature. Initially, I use a locked bootloader, unrooted,  real device (not an emulator). We can unpack the app using apktool:

apktool d app.apk
cd app
apktool b

Re-sign the dist/app.apk and install it on the device. In my case: the app won’t run: just a toast displaying: “App is not official”.

Find Raw Strings

We can use:

grep -r const-string smali/

To extract all strings in the code. In my case: I was not able to find many strings. On the string that I did find, it was used for loading class. It means that: we need to be careful when renaming a class: it could be referenced from somewhere else as a string.

Add Logging Code

With some effort, we can debug a smali project, but I prefer debug logging for doing two things: deobfuscating string and for tracing execution.

To add debugging, I created a Java file which I then compile to smali. The method can print any java Object. First, add the smali file for debugging to the smali directory.

To insert logging code manually, we just need to add:

invoke-static {v1}, LLogger;->printObject(Ljava/lang/Object;)V

replace v1 with the register that we want to print.

Most of the times, the deobfuscator method has the same parameter and return everywhere, in this case, the signature is:

.method private X(III)Ljava/lang/String;

We can write a script that:

  1. Finds deobfuscation method
  2. Inject a call to log the String

Printing the result string in the deobfuscate method is easy, but we have a problem: where (which line, which file) does the string comes from?

We can add logging code with more information like this:

const-string v1, "Line 1 file http.java"    
invoke-static {v1}, LMyLogger;->logString(Ljava/lang/String;)V

But it would require unused register for storing string (complicated, need to track which registers are currently unused), or we could increase local register count and use last register (doesn’t work if method already used all the registers).

I used another approach: we can use a Stack Trace to trace where this method is called. To identify the line, we just add new “.line” directive in the smali file before calling the deobfuscate method. To make the obfuscated class name easier to recognize, add a “.source” at the top of the smali. Initially we don’t know yet what the class do, so just give a unique identifier using uuid.

Tracing Startup

In Java, we can create static initializer, and it will be executed (once) when the class is used the first time. We should add logging code at beginning of <clinit>.

class Test {    
static { System.out.println("test"); }
}

I used UUID here (I randomly generate UUID and just put it as constant string in every class) that will helps me work with obfuscated name.

class Test {    
static {
System.out.println("c5922d09-6520-4b25-a0eb-4f556594a692"); }
}

If that message appears in logcat, then we know that the class is called/used. I could do something like this to edit the name:

vi $(grep -r UUID smali|cut -f 1 -d ':' )

Or we can also setup a directory full of UUIDS with symbolic link to the original file.

Writing new smali code

We can easily write simple smali code by hand, but for more complicated code we should just write in Java, and convert it back to smali. It is also a good idea to make sure it works on the device.

javac *.java
dx --dex --output=classes.dex *.class
zip Test.zip classes.dex
apktool d Test.zip

Now we get a smali that we can inject (copy to the smali folder)

This approach can also be used to test part of code from the app itself. We can extract smali code, add main, and run it.

adb push Test.zip /sdcard/
adb shell ANDROID_DATA=/sdcard dalvikvm -cp /sdcard/Test.zip NameOfMainClass

Think in Java level

There are several classes in the app that  extracts a dex file from a byte array to a temporary name, and then removes the file. The array is encrypted and the filename is random. First thing that we want to know is: is this file important? Will we need to patch it?

To keep the file, we can just patch the string deobfuscator: if it returns “delete”, we just return “canRead”. The signature of the method is compatible which is “()Z” (a function that doesn’t receive parameter and returns boolean).

It turns out that replacing the file (for patching) is a bit more difficult. Its a bit complicated looking at the smali code, but in general this is what happens:

  1. It generates several random unicode character using SecureRandom (note that because this is a “secure” random, altering the seed of SecureRandom won’t give you predictable file names)
  2. It decrypts the built in array into a zip file in memory
  3. It reads the zip file from a certain fixed offset
  4. It deflates the zip file manually
  5. It writes the decompressed result to a random dex file name generated at step 1
  6. It loads the dex file
  7. It deletes the temporary dex file

I tried patching the byte array, but then I also need to adjust a lot of numbers inside (sizes and offsets). After thinking in Java level, the answer is just to create a new Java code that can do what we want. So this is what I did instead:

I created a class named: FakeOutputStream, then patched the code so instead of finding java.io.FileOutputStream, it will load FakeOutputStream.

The FakeOutputStream will write the original code to /sdcard/orig-x-y, with x and y is the offset and size AND instead it will load the content of /sdcard/fake-x-y and write it to the temporary file.

Using this: when I first run the app, it will generate /sdcard/orig-x-y, and I can reverse engineer the generated DEX. I can also modify the dex file, and push it as /sdcard/fake-x-y, and that file will be loaded instead.

Time to Patch

After we can decrypt all file contents, we can start patching things, such as removing root check, package signature check, debugger check, SSL pinning check, etc.

Having the dex file outside of the main APK has an advantage: we can easily test adding or replacing method just by replacing the dex file outside the app.
 

SmartQ7

I just got my SmartQ 7 few days ago. In this post I want to share some technical thing (not a full review, you can find it somewhere else). Before giving my opinion about this device, I want to give quick update: I haven’t done much progress on the STR9104 FreeBSD port except to keep it up to date with FreeBSD Current. I am planning to start to work on it again this week. Andrew Certain have added joystick support for AppleWii. See the Google Code for latest version.

I bought this device from DealExtreme for 206.1 USD , this is the first expensive thing that I bought from DealExtreme (I only bought small things from then, usually my total is less than 20 USD). The thing shipped in about 10 days, but I need to get the thing from the post office, because I need to pay extra tax 350 baht (~11 USD).
Continue reading “SmartQ7”

Optimizing Asus EEE 900A

I just got back from my vacation around Thailand, so I will start to update things (Wii homebrew, Symbian apps, blogs, etc) again. Well, may be starting next week, I have a dental surgery this weekend and may need to rest. Anyway, this time I want to post about optimizing EEE 900A.

My wife was happy with her Asus EEE 701, but she would like something better with the same size. We sold the old Asus 701 to my brother, and she bought Asus EEE 900A. Compared to EE PC 701, the EEE PC 900A has a faster processor (Intel Atom 1.6 ghz vs the 900 Mhz EEE), more memory (1 gb vs 512 mb), bigger disk space (16 gb vs 4 gb), higher resolution (1024 x 600 vs 840×400), and better graphic processors (Intel GMA 950 vs Intel GMA 900). The only problem is the 16 GB SSD is much slower than the EEE 701 4 GB SSD. You can really feel it when running almost any applications, especially the firefox browser.

My wife uses Windows XP on the new Asus. After reading several blog posts and many forums, the conclusion is: to make everything faster, try to reduce the number of disk access. Here is how to reduce the disk access in Windows XP:

Continue reading “Optimizing Asus EEE 900A”

P990i Stylus Stuck

Sony Ericsson P990 Stylus It had been several months since my Sony Ericsson P990 stylus got stuck inside the casing. I was a little bit annoyed, since I can’t put a new stylus in it, but didn’t care too much because most of the time I just use my hand to select the menu, and use the keyboard to enter text.

When I bought a Torx T6 screw driver to replace MacBook Pro’s hard drive, I realized that the same screwdriver can be used to open P990i casing. So, I opened the casing, and I can pull out the old stylus. The stylus was stuck in a spring mechanism which I guess used to prevent the stylus from falling to easily.

You can look the disassembly pictures at
my photo album.

One thing that may not be clear from the instructions on the Internet is this: To open the part that covers the front camera: pull it upward (that is toward the upper side of the phone).

Internet Connection in Bali

As an Indonesian person, I have to admit that this is my first time going to Bali. I have gone to some other island in Indonesia, and even abroad, but this is my first time to Bali. Everybody knows that Bali is beautiful, and everything is quite cheap, so I won’t talk about it.

Instead, I will talk about information technology (IT) in Bali, specifically about Internet access and mobile stuff. Internet Access is quite easy to get, four stars and five stars hotels provide Internet access over WIFI, and sometimes I can find it at dining places. You can also access the Internet through GPRS or through 3G data connection with your cell phone. Starter pack for GSM is very cheap, but the internet access cost is quite expensive (25 rupiahs/kb, or about 2.8 USD/megabyte, at current rate).
Continue reading “Internet Connection in Bali”